Radiographers use Close-Contact (Category I) SCAR to minimize source-to-film distance (SFD), reduce exclusion zones, and perform inspections near other trades, nucleonic process control equipment, and critical safety systems. In Close-Contact SCAR, the 1075 SCARPro attaches directly to the pipe.
This guide shows how to set up the 1075 SCARPro with a 30 Ci (1.11 TBq) Se-75 sealed source and proper shielding to achieve ~2 mR/hr (20 μSv/hr) at a 10 ft (3 m) exclusion boundary.
Recommended Equipment
Before You Start
- Confirm job plan, RSO authorization, and communication method
- Perform a daily inspection on your equipment
- Verify instrument function and calibration dates
- Establish and rope off a 10 ft (3 m) exclusion zone
- Evacuate the area and ensure clear communications
- Confirm shielding configuration is appropriate for pipe geometry
Step-by-Step Close-Contact SCAR Process
Step 1: Mount the 1075 SCARPro
Place the 1075 SCARPro directly on the pipe using the contact fixture kit.
Step 2: Install Shielding
Position the SCAR shielding underneath the pipe where the 1075 SCARPro is mounted. The shielding directs radiation away from occupied areas below the pipe.
Step 3: Connect Remote Controls
Connect the remote controls to the 1075 SCARPro following standard connection procedures. Verify all connections are secure before proceeding.
Step 4: Drive the Se-75 Source to Position
From outside the 10 ft (3 m) boundary, use the remote controls to drive the 30 Ci Se-75 sealed source into position for taking an exposure.
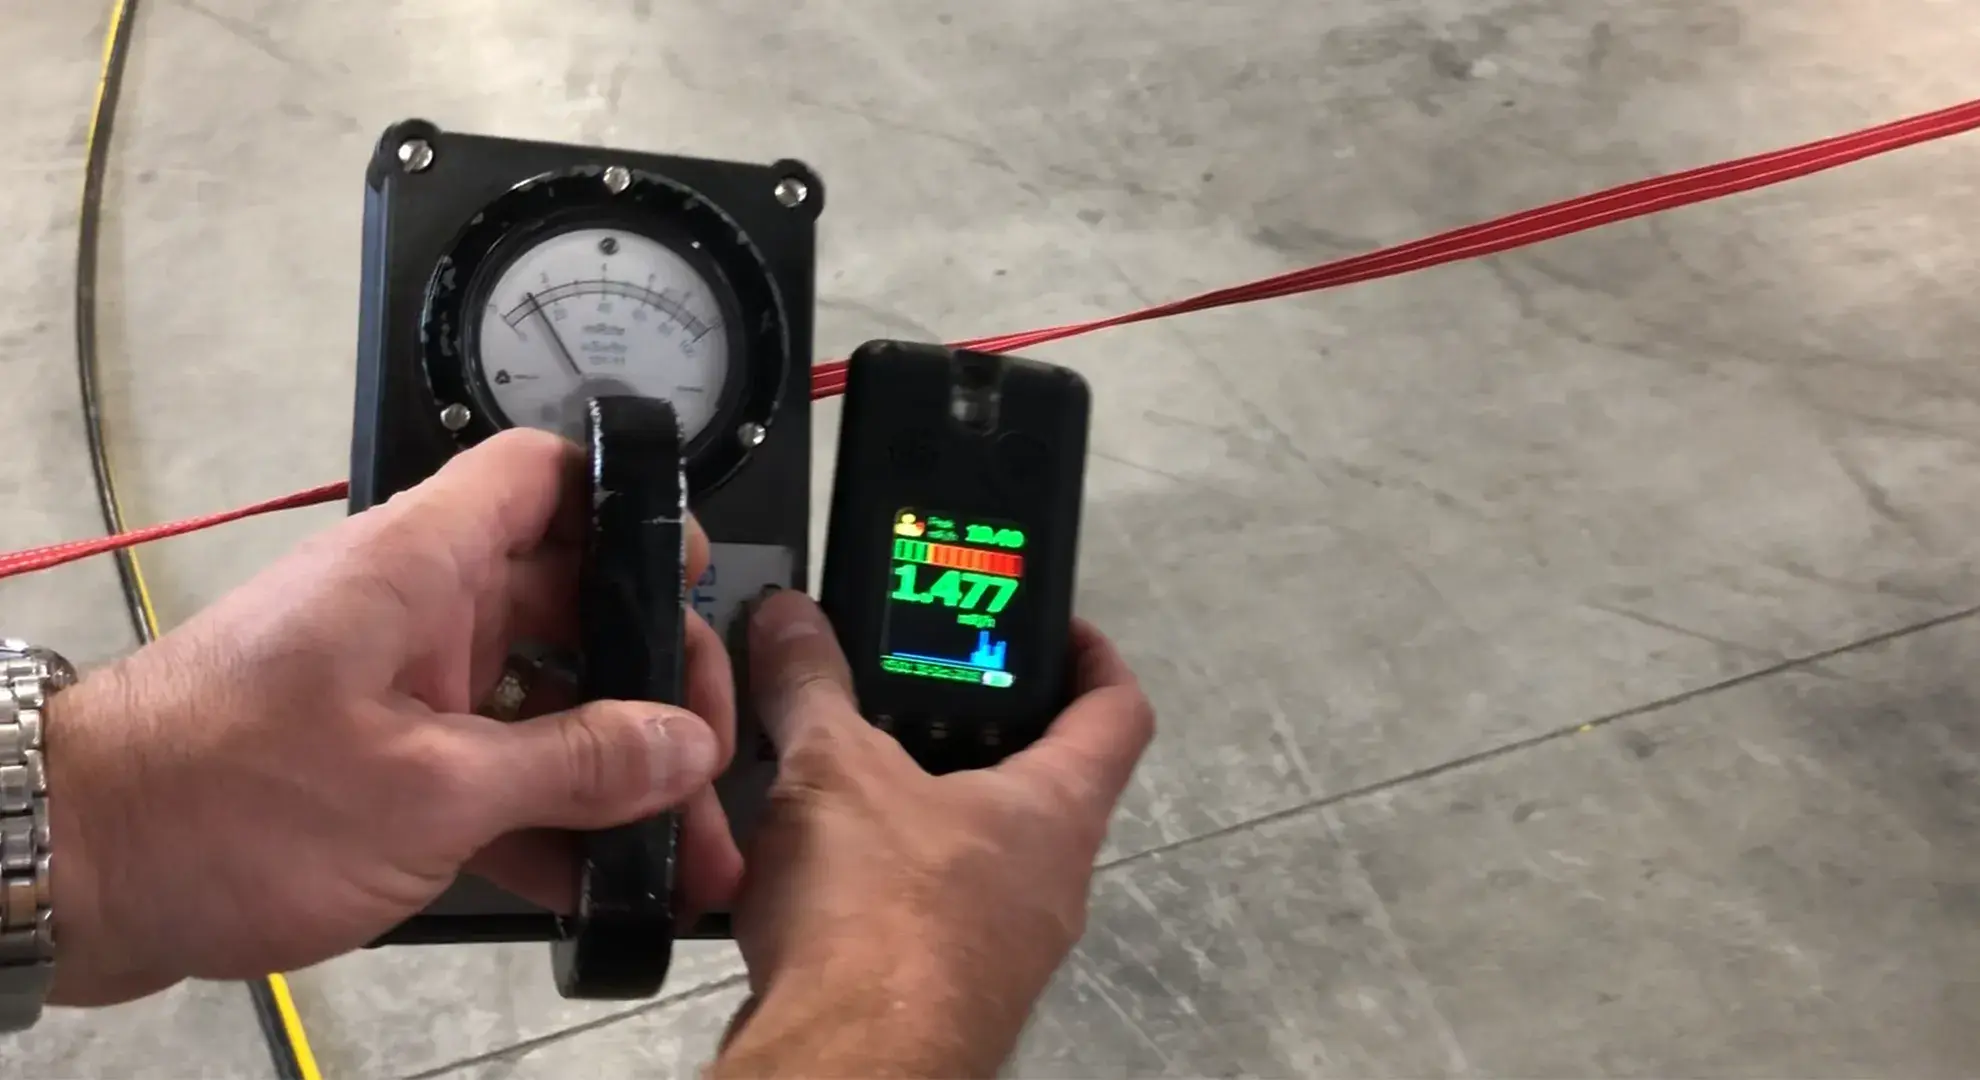
Step 5: Verify Boundary Dose During Exposure
- Walk the entire 10 ft (3 m) perimeter with the Tracerco black PED+
- Spot-check with the survey meter
- In our setup, boundary readings were ~2 mR/hr (20 μSv/hr) at 10 ft (3 m). Your readings will depend on geometry, shielding, and site conditions.
Note: For an Ir-192 sealed source, the same configuration would require a minimum 100 ft (30 m) boundary.
Step 6: Reposition for Horizontal Contact Shot
- Return the source to the shielded position
- Rotate the 1075 SCARPro and shielding 90 degrees for the second contact shot
Step 7: Drive the Se-75 Source for Horizontal Exposure
- From outside the 10 ft (3 m) boundary, use the remote controls to drive the 30 Ci Se-75 sealed source into position for the horizontal exposure.
Step 8: Verify Boundary Dose During Exposure
- Walk the entire 10 ft (3 m) perimeter with the Tracerco black PED+
- Spot-check with the survey meter
- In our setup, boundary readings were ~2 mR/hr (20 μSv/hr) at 10 ft (3 m). Your readings will depend on geometry, shielding, and site conditions.
When to Use Close-Contact SCAR
- Piping 3" OD and above
- Areas with ongoing operations or other trades working nearby
- Locations with nucleonic process control gauge or critical safety systems
- Turnarounds and outages where time is critical
- Offshore platforms with limited space
Conclusion
The step-by-step process provided above proves that close-contact SCAR using the 1075 SCARPro achieves 2 mR/hr (20 μSv/hr) readings at 10 ft (3 m) boundaries with proper setup and Se-75 sources. This is a significant reduction from the 100+ ft (30+ m) boundaries typically required for conventional gamma radiography with Ir-192.
Following this process provides the framework for testing this technique in your own operations, allowing you to verify these boundary measurements and evaluate close-contact SCAR for your specific applications.
Note: This guide demonstrates one specific Close-Contact (Category I) SCAR setup. Actual dose rates and boundary requirements will vary with source activity, geometry, shielding, and site conditions. Always survey boundaries with calibrated instruments, follow your facility's radiation safety procedures, obtain proper RSO authorization, and comply with applicable regulatory requirements before performing SCAR radiography.